Product added to cart
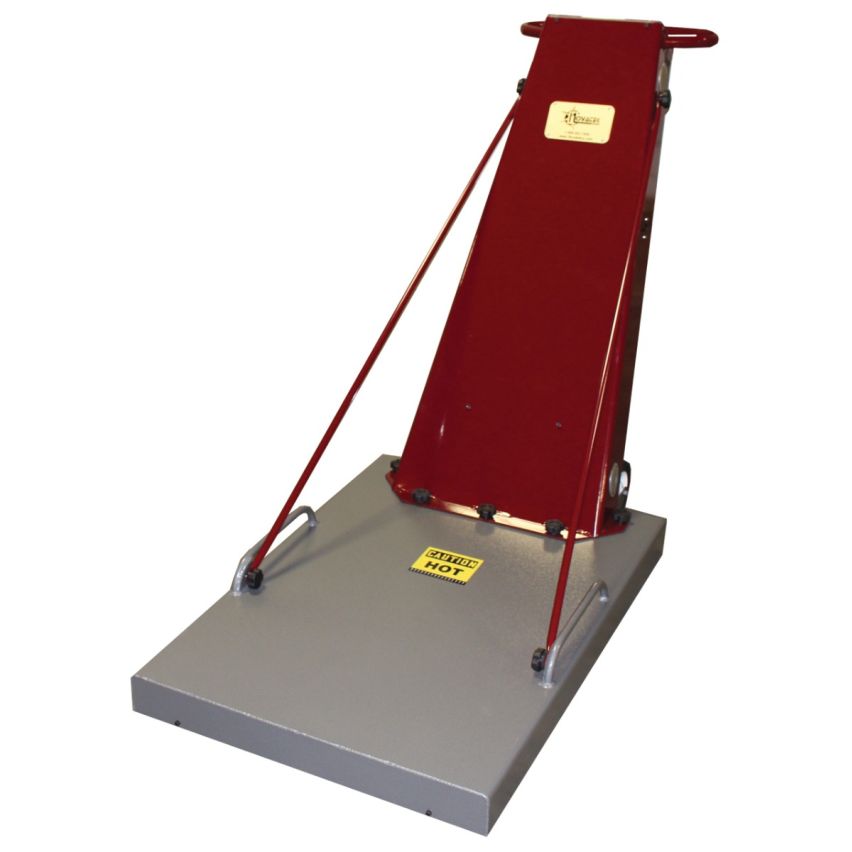
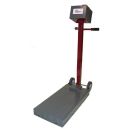
NovaStrip 1026 VAT Floor Stripper (DOES NOT INCLUDE THE CORD)
$9,345.00
In stock
SKU
ME0202
The NovaStrip 1026 VAT stripper utilizes "infrared radiant heat" to safely heat tiles, thus breaking the adhesive bond. This allows you to lift intact tiles in a dustless environment.
The NovaStrip 1026 VAT stripper utilizes "infrared radiant heat" to safely heat tiles, thus breaking the adhesive bond. This allows you to lift intact tiles in a dustless environment. In the past, wetting and hand scrapping was the most common method of removal. This process has proven to be labor intensive and generates a great deal of cleanup. Since water is not required with the NovaStrip 1026, the job is completed with an absolute minimum volume of waste. These machines also cut labor costs by requiring only one operator. Simply place the machine over your tiles to be removed, set the timer and allow it to complete its cycle. Move the machine to the next set of tiles, then easily remove the previously heated tiles. It's That Simple!
Features and Benefits
- Reduces setup, clean up, and labor costs.
- Heated tiles can be lifted INTACT preventing the harmful release of dust or hazardous materials.
- Removes up to six 12" x 12" tiles at a time.
- Massive 28" x 40" footprint.
- Rapid heat-up and cool down for efficient operation.
- All solid state electronics assure precision and reliability.
- Modular design, fully assembles and disassembles in less than 5 minutes for easy transport.
- Can even ship via UPS.
- Individual ceramic emitter strips on heat element and fully replaceable.
- No need to replace entire heat panel.
- All components are UL and CE listed and are covered by a one year warranty.
Specifications
- Part no.: N1026
- Weight: 88 lbs.
- Height: 46"
- Tile Removal: 9”x9”=12 & 12”x12”=6
- Power Requirements: 220/ 240 volts, 50 amp. 1 phase
- Pad Size: 28” x 40”
| Brand | Novatek |
|---|---|
| Hand Tool Type | Floor Stripper |
| Voltage | 220/240V |
| Current | 50 Amp |
| Material | Aluminum |
| Sold As | Each |
Write Your Own Review
Prior to Start-up
Prior to attempting tile removal with the Novastrip ensure the following:
- Make sure to clean dirt and debris from floor surface prior to tile removal.
- Whenever possible, strip excess wax and/or coating build-up on floor surface.
- Familiarize yourself with all fire extinguishers, fire safety equipment, and emergency exits.
- Remove any dust, dirt, or waxy residue build-up on heat panel surface.
- Remove any dust or dirt built-up on the controls and control panel.
- Make sure you have heat resistant gloves for the HOT tile removal.
- You might have to install the handle if the unit was shipped to your location. When installing the handle, make sure
to connect the power plug and thermocouple.
Start-up
- Position unit over a section of concrete to allow unit to heat to desired temperature. If concrete area is unavailable position unit over tile being removed.
- Check unit to make sure emergency stop button, breaker and key switch are in the off position.
- Plug power cord into unit and be sure to twist cord connector ¼ turn clockwise on N1026 to lock the plug into position.
- Plug power cord into a grounded 20Amp outlet for N378 or 50Amp for the N10126.
- Pull emergency stop button out to the ON position.
- Switch main breaker to the ON position. (N1026 Only)
- Turn Key switch to the ON position. (N1026 Only)
- The temperature / timer controller will light and run a self-diagnosis test which will take about five (5) seconds. If not, make sure Emergency STOP Button is in the pulled-out position and there is grounded power going to the unit.
- Heat panel will take about 15-20 minutes to heat to the factory preset temperature. CAUTION: At this point unit is on and panel is heating.
If the Novastrip is positioned over tile, check tile periodically to ensure you are not over-heating the area. Unit may
have to be moved to a new section of tile before unit is up to full temperature. CAUTION: While heat panel is heating to temperature if positioned over tile, check the tile periodically to insure you are not over heating the tile area. Unit may have to be moved to a new section of tile before unit is up to full temperature. - Once the unit reaches full temperature, reset timer to begin the timing function. This timer may be reset to meet your needs with a maximum preset time of 59.99.
NOTE: Once the timer reaches ZERO, power is cut to the heat panel, push the reset button to start elapse time or unit will proceed to cool down.
Removal Procedure
At this point the heat panel has heated to full temperature ready for heat application. Different floor characteristics such as the tile thickness, tile adhesive, or just the material makeup of the tile will result in different heat-up and removal times. A routine will quickly be established for each new removal application.
- Place NOVASTRIP 1026 or 378 over designated area of tile to be removed.
- Push the timer reset button to start / continue the preset time cycle.
- Once the timer reaches zero an audible alarm will sound. This means it is time to move the unit to a new section of tile to be removed. Press reset button.
- While the unit is heating the new section of tile, remove the previously heated tile with a Long Reach Scraper.
- Once you have completed your removal application for the day, allow the time cycle to reach zero (alarm will sound) or press Emergency Stop Button.
- This will shut off the power to the heat panel and the controller will go into cool down mode which will allow it to return to room temperature.
- Place a block under the front of the unit’s base shroud. This will allow air to circulate under the shroud helping to accelerate the cooling process.
- The controller display will indicate the cooling process.
- Once the controller displays "safe to transport" and the heat panel sticker on top of base shows 95° or less, the unit is ready to be moved.
- Turn the key switch to the OFF position. (N1026 Only)
- Switch circuit breaker to the OFF position. (N1026 Only)
- Disconnect plug from power source.
We found other products you might like!


